Ricks Lightning
Through the generosity of Rick and Bob I have assembled all the info here and used Rick's great description with Bobs Excellent photos.
(I added Bobs photos for clarity)
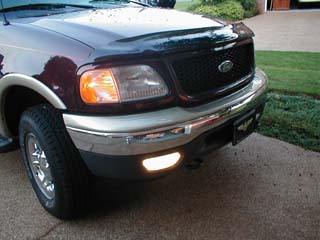
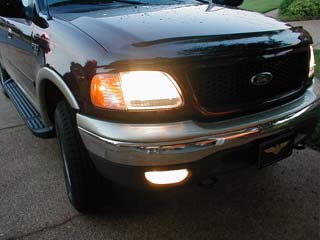
This document is the culmination of data and experience gained in altering the stock functionality of the 2000 Lightning's Fog or Driving Lights. These are the round lights housed in the front lower fairing, and are referred to in this document as Foglights.
This document is written based on my 2000 model year only,
but the information presented here may be useful for other model years.
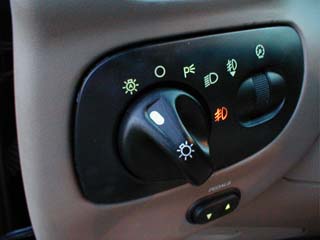
In the stock mode of operation, you are only able to activate the fog lights when the headlight switch is in the full 'on' (or headlamp position), mainly because it is the only position where you can physically pull out the switch to activate the fog lamps.
Through testing and guessing, I have altered my truck's headlight switch mechanism and wiring in such a way that I am able to:
How? There are 2 parts I recommend in this procedure - the physical modification, and the electrical modification.
Results at this point:
You should be ready to start working.
Results at this point:
Your foglamps should now activate with your headlamps in autolamp mode. Reassemble everything, turn the headlamp switch to autolamp, pull out on the headlamp switch, and turn the ignition to 'on'. You can now fool the autolamp sensor (underneath the plastic 'grille' in the middle of the dashboard) to activate by covering it and deactivate it by shining a flashlight into it.NOTE: Canadian owners' trucks will work differently at this point. Instead of the foglight only turning on with the autolamps when the switch is in the appropriate position, the foglamps will light whenever the ignition is on. This is due to the added DRL (Daytime Running Lights) feature, which is apparently mandatory in Canada. This is probably fixable, but requires the electrical splice described below, AND cutting the #2 wire away from the switch connector. Read on...
This is the easiest part. If you look at the wire connector that plugs into the back of the headlamp switch, there should be 9 wires of varying colors. Although the connector has space for 12 wires, only 9 of them are used. Also, on the wire side of the connector (as opposed to the switch side of the connector, which is the side you would insert into the switch), the wire positions are numbered.
Okay, find the #2 wire (white/black) and the #12 wire (brown) that is attached to the connector and splice them together. That's it! No cutting needed! Don't forget to electrical tape/insulate your splice well.
NOTE: For Canadian owners, after performing the electrical splice described above, you should cut the #2 wire away from the switch connector to achieve the results below. Also keep in mind that this addition step is my best guess at a solution, but should be considered untested. If you try this on a Canadian 2000 Lightning, please let me know your results.
Results at this point:
In addition to working with the autolamps, you should now be able to activate
your foglamps with just your parking lights. Make sure to test everything BEFORE
popping the switch console back into the dash... much easier this way in case something
is/goes wrong.
Well, that's it for duplicating my truck's added foglamp features. There are, however, other possible variations to this procedure.
For example: to convert your foglamps to psuedo-DRL's you can splice the #5 wire to the #7 wire to have the fogs turn on whenever you rotate the headlamp switch to the auto position (filing the switch isn't necessary for this one). Or to make the fogs always turn on with the parking lamps, you can splice the #5 wire to the #12 wire (no filing for this one either). If you want to make your own variant, I would study the data I gathered to see how you might go about getting the exact behavior you want.
If there are any questions or feedback, please let me know!
View the Data Collected.
View the original Message Board thread.
My thanks to WHAT04, Struck99, and all my friends on the F150 Online Lightning Message Board.
These drawing show the connections made by the headlamp switch in a number of stock positions.
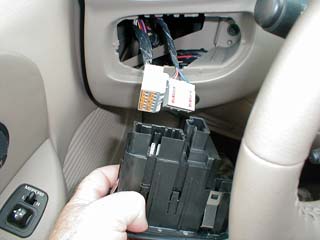
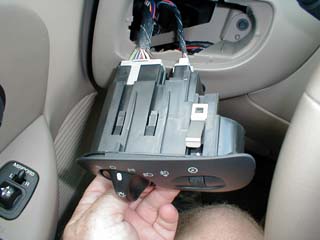
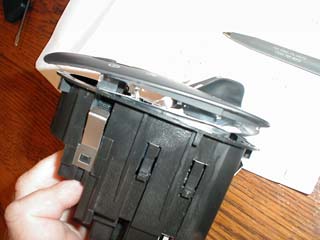
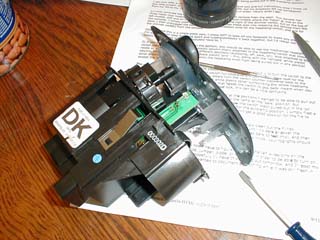
Remove Lighting control panel, It just pulls out Disconnect cables from back
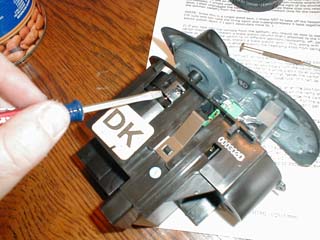
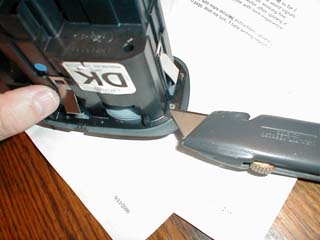
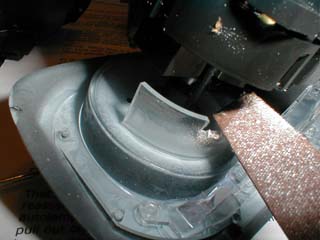
Cut off "heat tabs" holding the face plate onto the control box Lift the rotary part of the switch
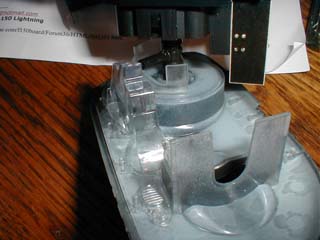
Detail of the "arm" and "ramp"
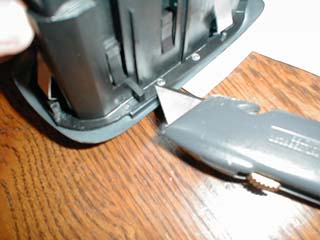
File and/ or cut out another "ramp"
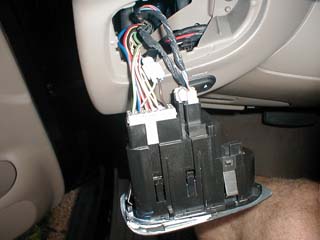
Reinstall control box and splice #2 (white/ black) and #12 (brown) wires
together
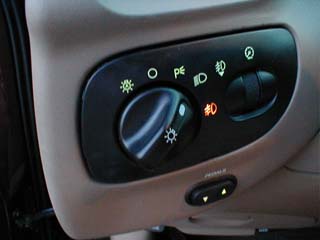
Operation: Parking lights selected and knob pulled out (note amber fog light illuminated)
Auto selected with knob pulled out
What 04's description
Got my new switch today and decided to do this job right.
I cut the melted tabs off the back of the switch faceplate and removed the switch knob.
With the faceplate off, it is much easier to cut the ramp on the back of it. Not a long job. Just duplicate the ramp of the normal ON setting.
Now comes the slick part. With the faceplate off, two tabs lift up and the
whole rotary part of the switch comes out.
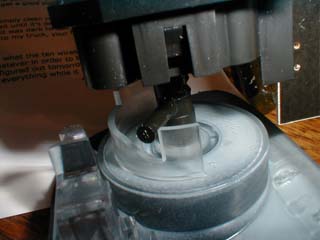
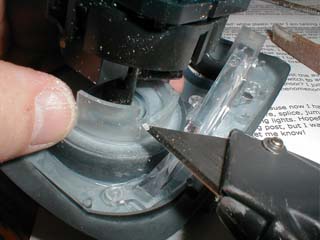
Now you have access to the switch shaft which has grooves cut in it. There is a
stationary spring-loaded nipple that pops into these grooves to give the
clicking action on the switch when you pull it out for fogs. The grooves do not
wrap around the shaft far enough to click when pulling the switch in the
autolamp position. Simply file the groove maybe 20 degrees further around and
VOILA, the switch clicks up and down in the autolamp position just like the ON
position. Feels like factory to me. No more wonky switch that feels broken
somehow.
Gluing the faceplate back on is a snap if you have crazy glue or CA glue (ask your hobby store).
Unfortunately, my fogs are always on if the switch is pulled, but hey, us Canadian boys gotta be different, eh?!?