
Photo from Winner of the August Car Club Bash (over 90 cars & trucks). Lone Star Raceway, Sealy, Texas 2000.
Photo from Winner of the August Car Club Bash (over 90 cars
& trucks). Lone Star Raceway, Sealy, Texas 2000.
Step By step to install a Pro M MAF on his 1999 Lightning
Ok guys, for you less experienced here is a step by step with pics.
( These are Thumbnails to accommodate folks with SLOW connections, click on the picture to see larger version )
1. Disconnect negative battery cable (the silver one)
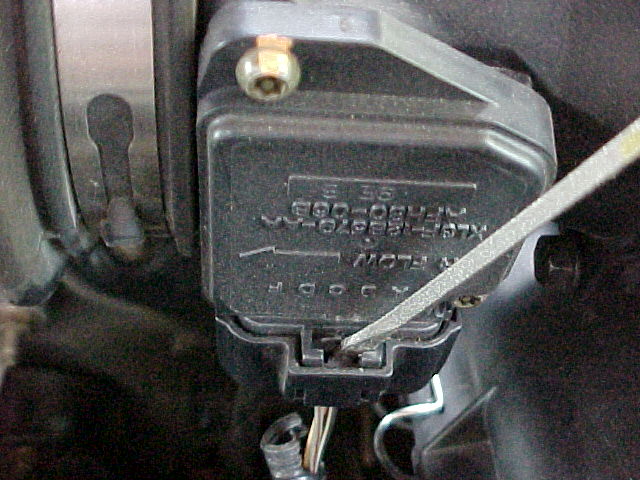
2. Loosen this screw.
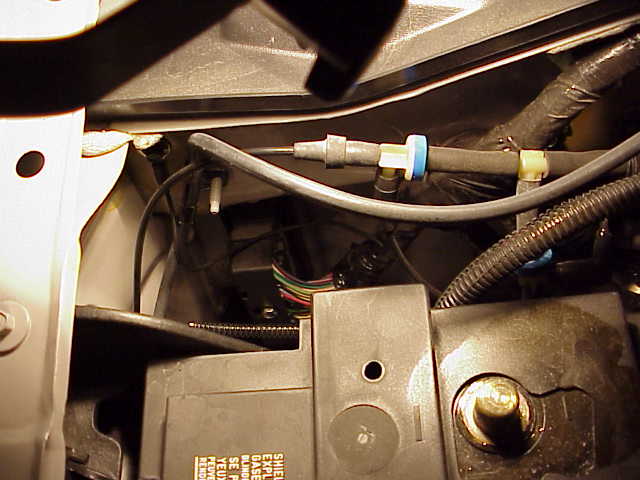
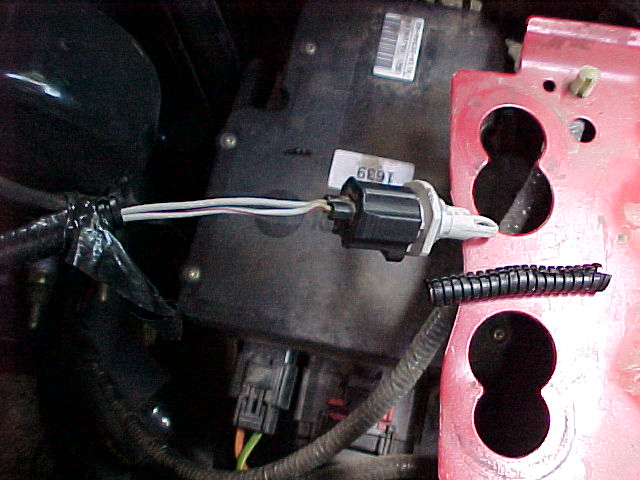
3. Disconnect MAF primary sensor attached to hose. Put
screwdriver tip between outside of clip and center tab. Push center tab toward
back which releases plug to drop down. Gently wiggle plug with downward pressure
while applying pressure with screwdriver to tab. Do not use too much force or
turn blade as you might brake sensor clip bracket.
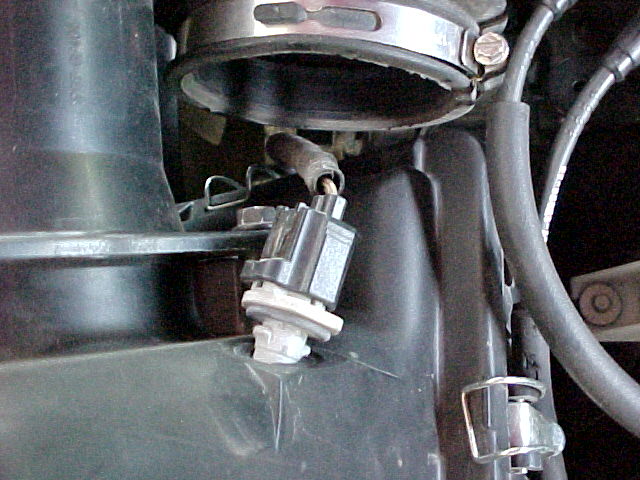
4. Remove temp sensor from lower rear of air box by turning 90
degrees and gently pulling out without damaging head. Turn it in which ever
direction it turns the easiest. BE CAREFUL.
5. Remove box and rubber piece going into fender. Box pulls straight up. Remove grommets that hold box. Put this stuff in your spare parts collection.
6. Strip back covering from temp sensor which you removed from
the air box, about 4" worth. There is tape and plastic tubing. You will see
two wires. Don't bang around temp sensor while doing this you will break it.
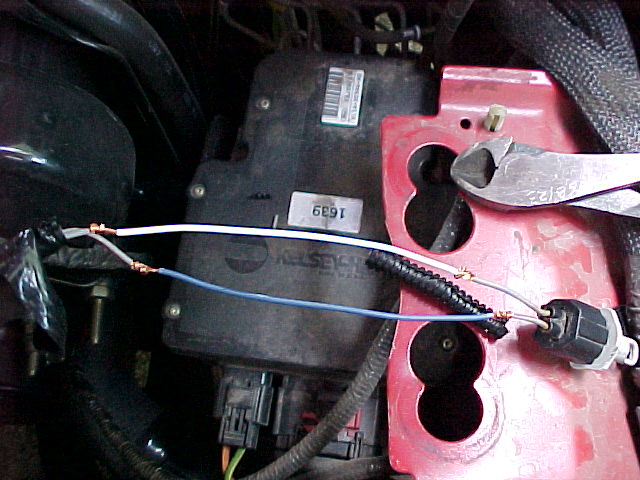
7. Note that one wire has black stripe. They are different and
not interchangeable, so when adding wire extension make sure the striped wire
gets hooked to the striped wire. Extension wire should be taped to instruction
sheet. Look at photo before cutting wires. Notice I cut them off set. This protects
you in a worse case scenario where if all your tape comes off the wires still
will not touch and short out. I soldered mine and I recommend this over butt
connectors which crush the wire, which can then break from vibration or come
loose.
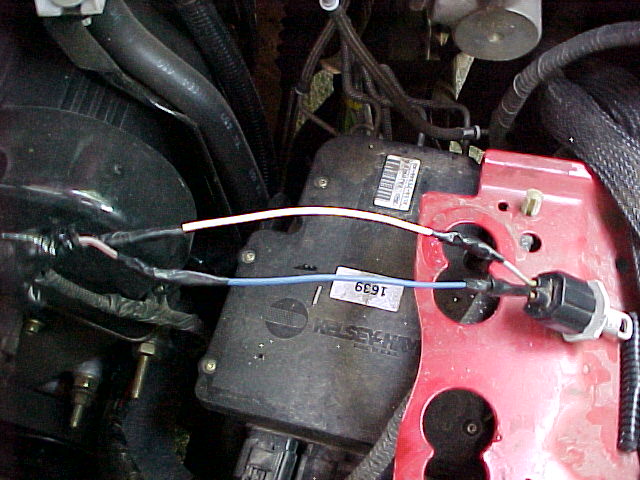
Tape all four connections.
Let's talk tape. All tape is junk except for 3 M Tartan tape which comes in a plastic box, cost about $4.00 a roll and can be bought at Home Depot. All other tape tends to get hot and loose it's ability to stick and starts to unravel. This tape is worth the money. Ask any electrician. Now start wrapping tape from plastic to sensor going about 1/4" per turn. Make a couple of loops at the sensor (include the two plastic nipples on the back of the sensor and start backward wrapping to the place you began.) Take your fingers and gently press together along entire length. When soldering make sure solder flows into wire. No little round balls of solder. Solder will flow when the wires get hot enough.
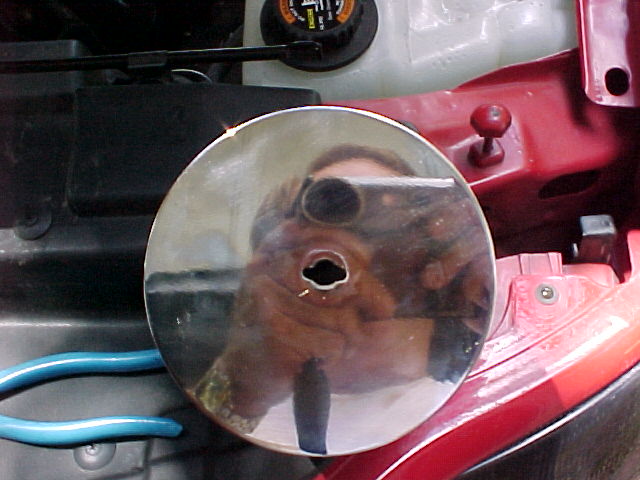
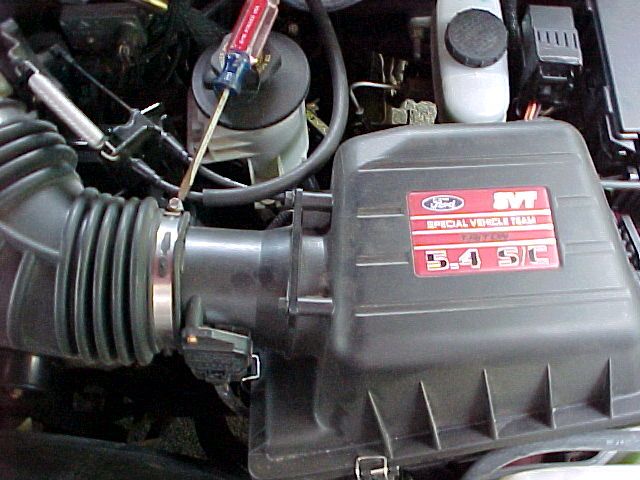
8. Test installing sensor in end of filter (the one you just
got through adding the wire to)
Do not FORCE. Mine shown here is not a K&N. I looked at the K&N and it
seemed to be better prepared but may still need some work to get sensor in
filter. If It doesn't go in first remove filter from MAF (three nuts). Hold
filter with top parrallel to ground and take a 1/4 rat file and gently work
hole. Usually you need to elongate the area where to two tabs fit in. Smooth off
any rough corners you create. Test sensor. If any friction is encountered file
some more. If you try to force sensor you're going to break it. When sensor goes
in and turns 90 degrees you are done with this step.
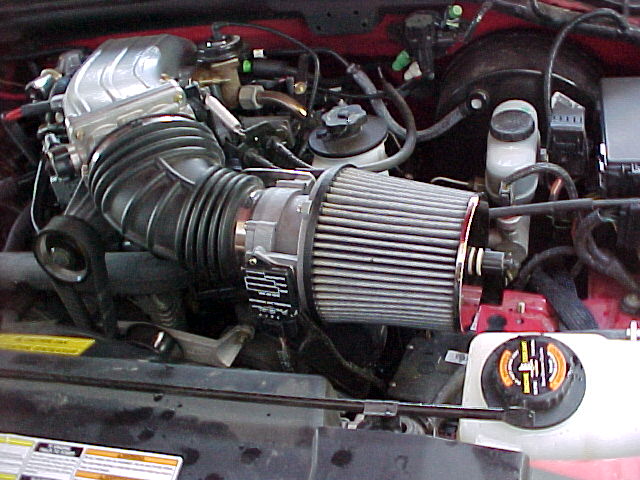
9. Now you must clean filter from any possible filings that may have gotten into filter. I blew mine out. (If you did this right there is probably none in filter) If you don't have a compressor use a vacuum cleaner. Visually inspect inside of filter and then reinstall on MAF. As these are self-locking nuts do not over tighten. Just get snug up against the MAF housing.

10. You are now ready to install MAF. Gently push MAF into
rubber housing. Look on intake at rear for black plate with hole that will be
close to mounting plate on MAF. Mine seemed to want to go on bottom of engine
plate so I but it on the bottom. Install bolt, nut, and lock washer provided but
do not tighten.
11. Make sure MAF goes into rubber all the way around and then tighten screw on clamp. While you have the screwdriver in your hand check screw on clamp at other end of rubber tubing at blower housing.
12. Install MAF sensor plug to MAF housing. I put my thumbs on top and pulled up plug until it snapped into clip.
13. Install temp sensor in end of filter. Factory recommends
putting silicone on area where sensor will rest on filter end to keep it from
not vibrating loose. Do NOT get silicon on sensor end. ( I skipped the silicone.
What's the big deal if it falls out then I'll use the silicone.)
14. Tighten bolt on back of MAF at engine plate.
15. Reattach battery cable. Start engine and go through start up procedure. At idle park, drive, park AC on, drive with ac on, park, turn engine off. If you don't do this and go down the road and try turning on AC it will not come on unless you drop rpm to idle.
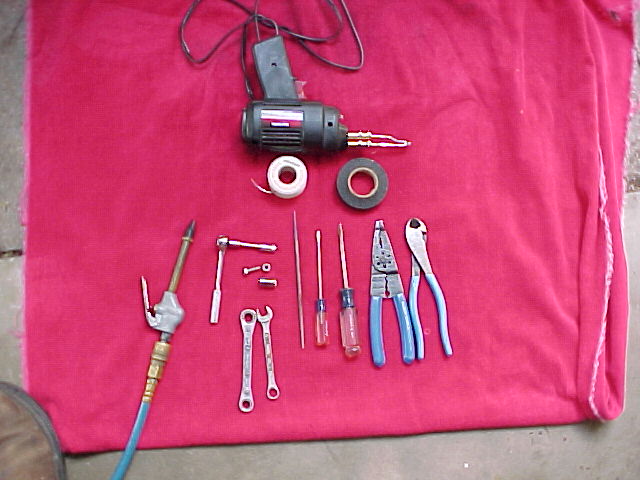
Tools I used.
Total time including taking pictures (and I had never done it
before either) 40 minutes, but I went and found all the tools first.
noelvm
"Noel McGaughey"
Published here with Authors permission